How to Cannulate the ReTAP AV Graft®
Always follow your facility’s usual protocol for care and cannulation.
Step 1: Determine Cannulation Depth
Verify Blood Flow
- Verify the graft has adequate blood flow by following your facility’s procedures for checking for thrill and/or bruit, and recording any changes in the patient’s chart.
- Do not cannulate a thrill or bruit is not present.
- Verify the direction of blood flow according to your facility’s protocol.
Select Appropriate Dialysis Needle
- Determine needle length and gauge based on the graft according to your facility’s protocols.
- Typically the smallest gauge and shortest length needle that will achieve the required flow
rate for dialysis is best.
Step 2: Locate the ReTAP Cannulation Zones
ReTAP AV Graft Configurations
- The ReTAP AV is available in both a looped (two cannulation zones) and a straight
(single cannulation zone) configuration. - Each version of the graft can be implanted in the lower arm, upper arm or the leg.
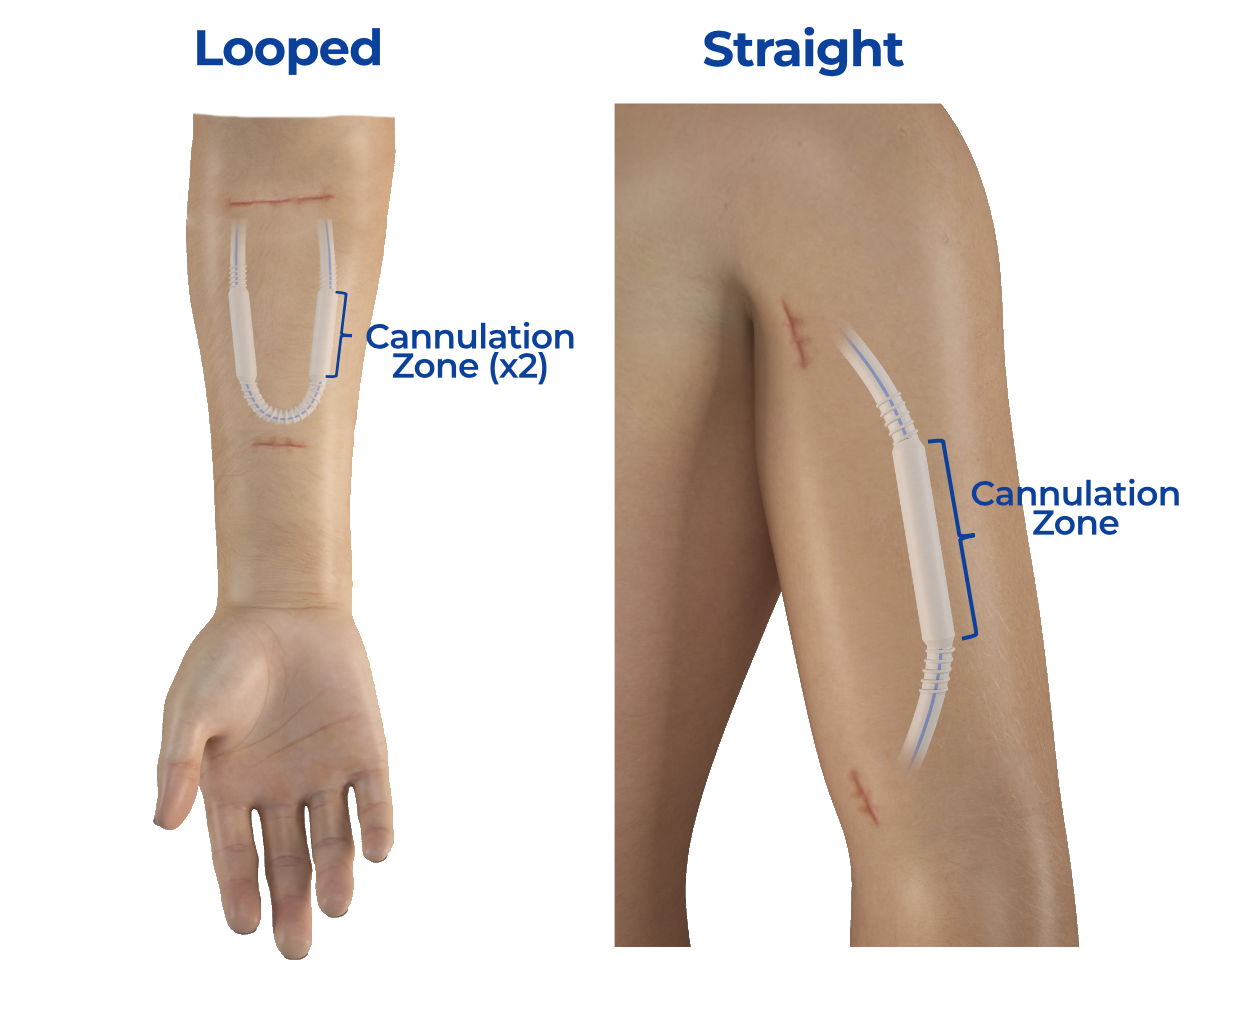
Locate ReTAP Cannulation Zone(s)
- Determine the device location and configuration by verifying the patient’s surgical record or implant card.
- If the patient’s graft was implanted in a looped configuration, there will be two 7 cm long ReTAP zone; one for the arterial needle, one for the venous (return) needle.
- If the patient’s graft was implanted in a straight configuration, there will be one 10 cm ReTAP zone for both the arterial and venous (return) needles.

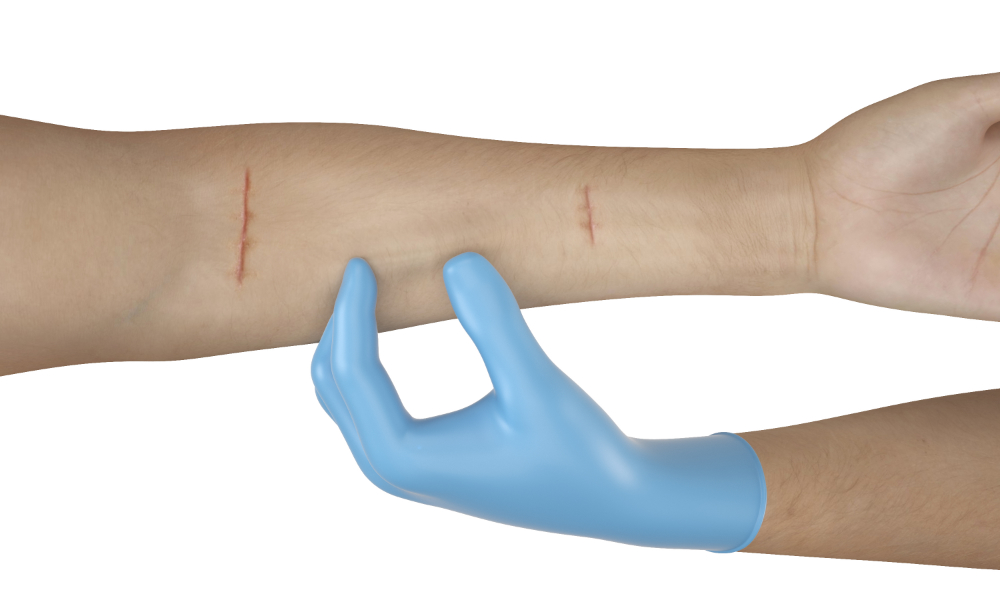
Step 3: Select and Prepare Access Sites
Select Access Sites
- Cannulation sites should be rotated & spaced about 1 cm apart along ReTAP cannulation zone.
- Chart access site date and location per your facility’s procedures.
Aseptic Preparation of Access Sites
- Follow your facility’s procedure for aseptic preparation of the cannulation sites.
Step 4: Cannulate the ReTAP Zones of the Graft
Needle Direction and Blood Flow
- Follow your facility’s procedure for needle direction and spacing. The venous (return) needle must always be positioned in the direction of blood flow (antegrade). The arterial needle may be positioned antegrade or against (retrograde) the blood flow. Use of retrograde positioning is recommended.
- For single-needle dialysis the needle is always positioned in the direction of blood flow.
Cannulation

Locate – Palpate the ReTAP section by using the non-cannulating hand.
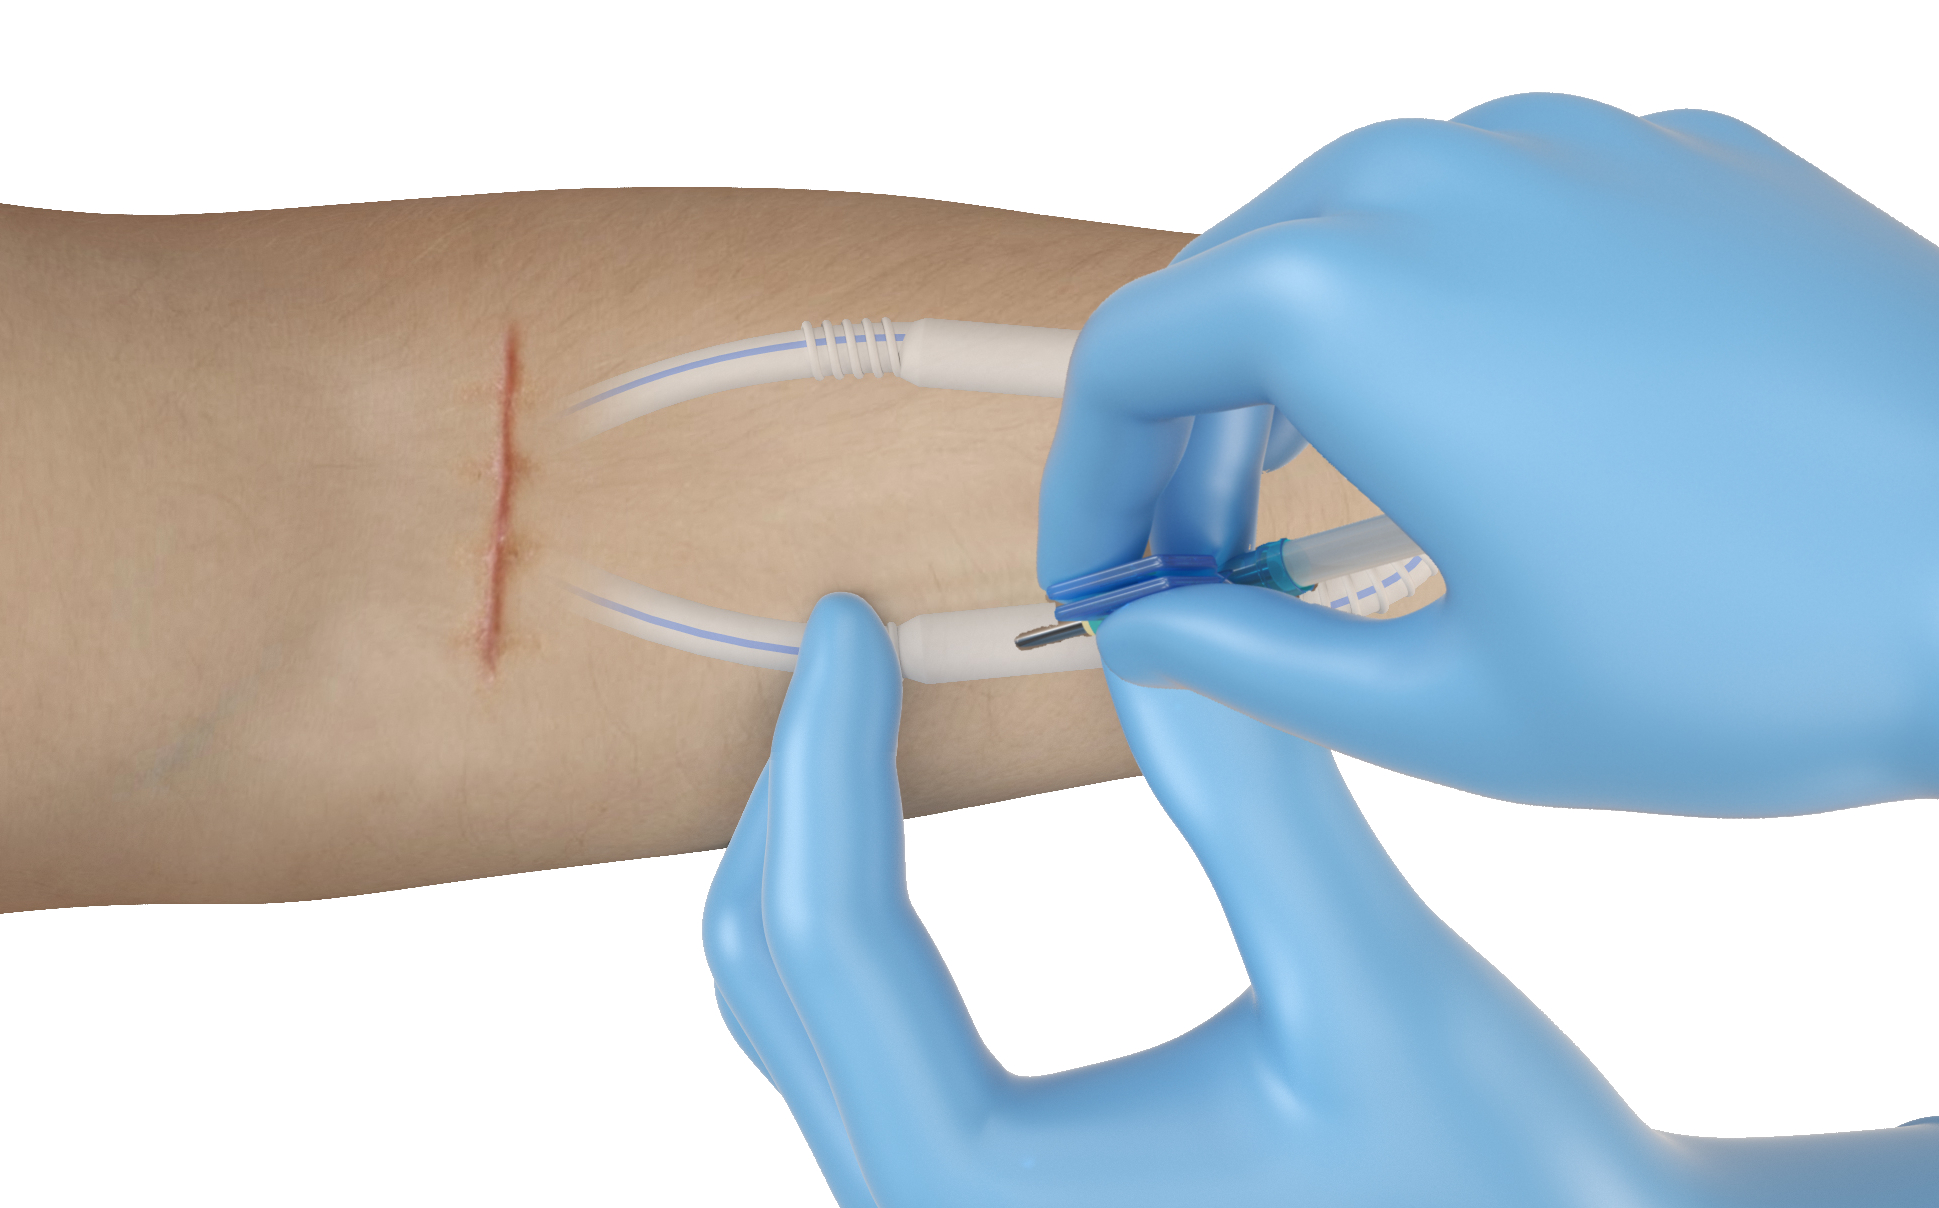
Approach – With the needle bevel facing up, approach the cannulation point at a 45-60° angle.
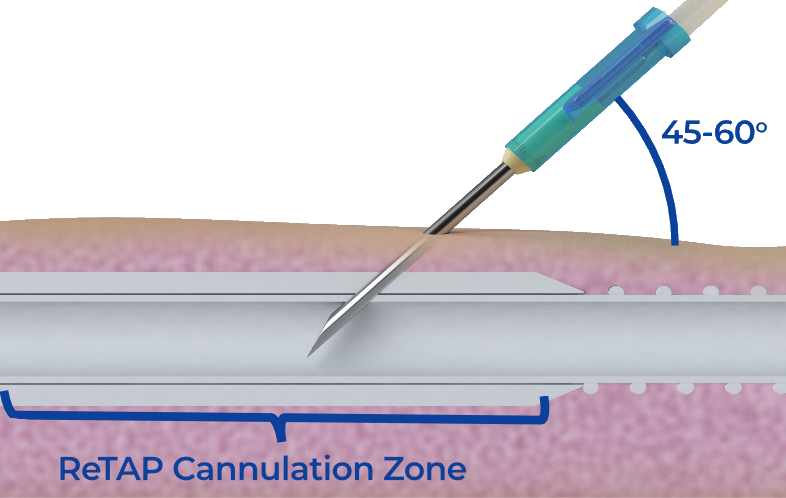
Cannulate – Advance the needle until there is blood flashback to verify the needle is in the lumen of the graft.
Note: Some resistance will be felt as the needle penetrates the ReTAP section.
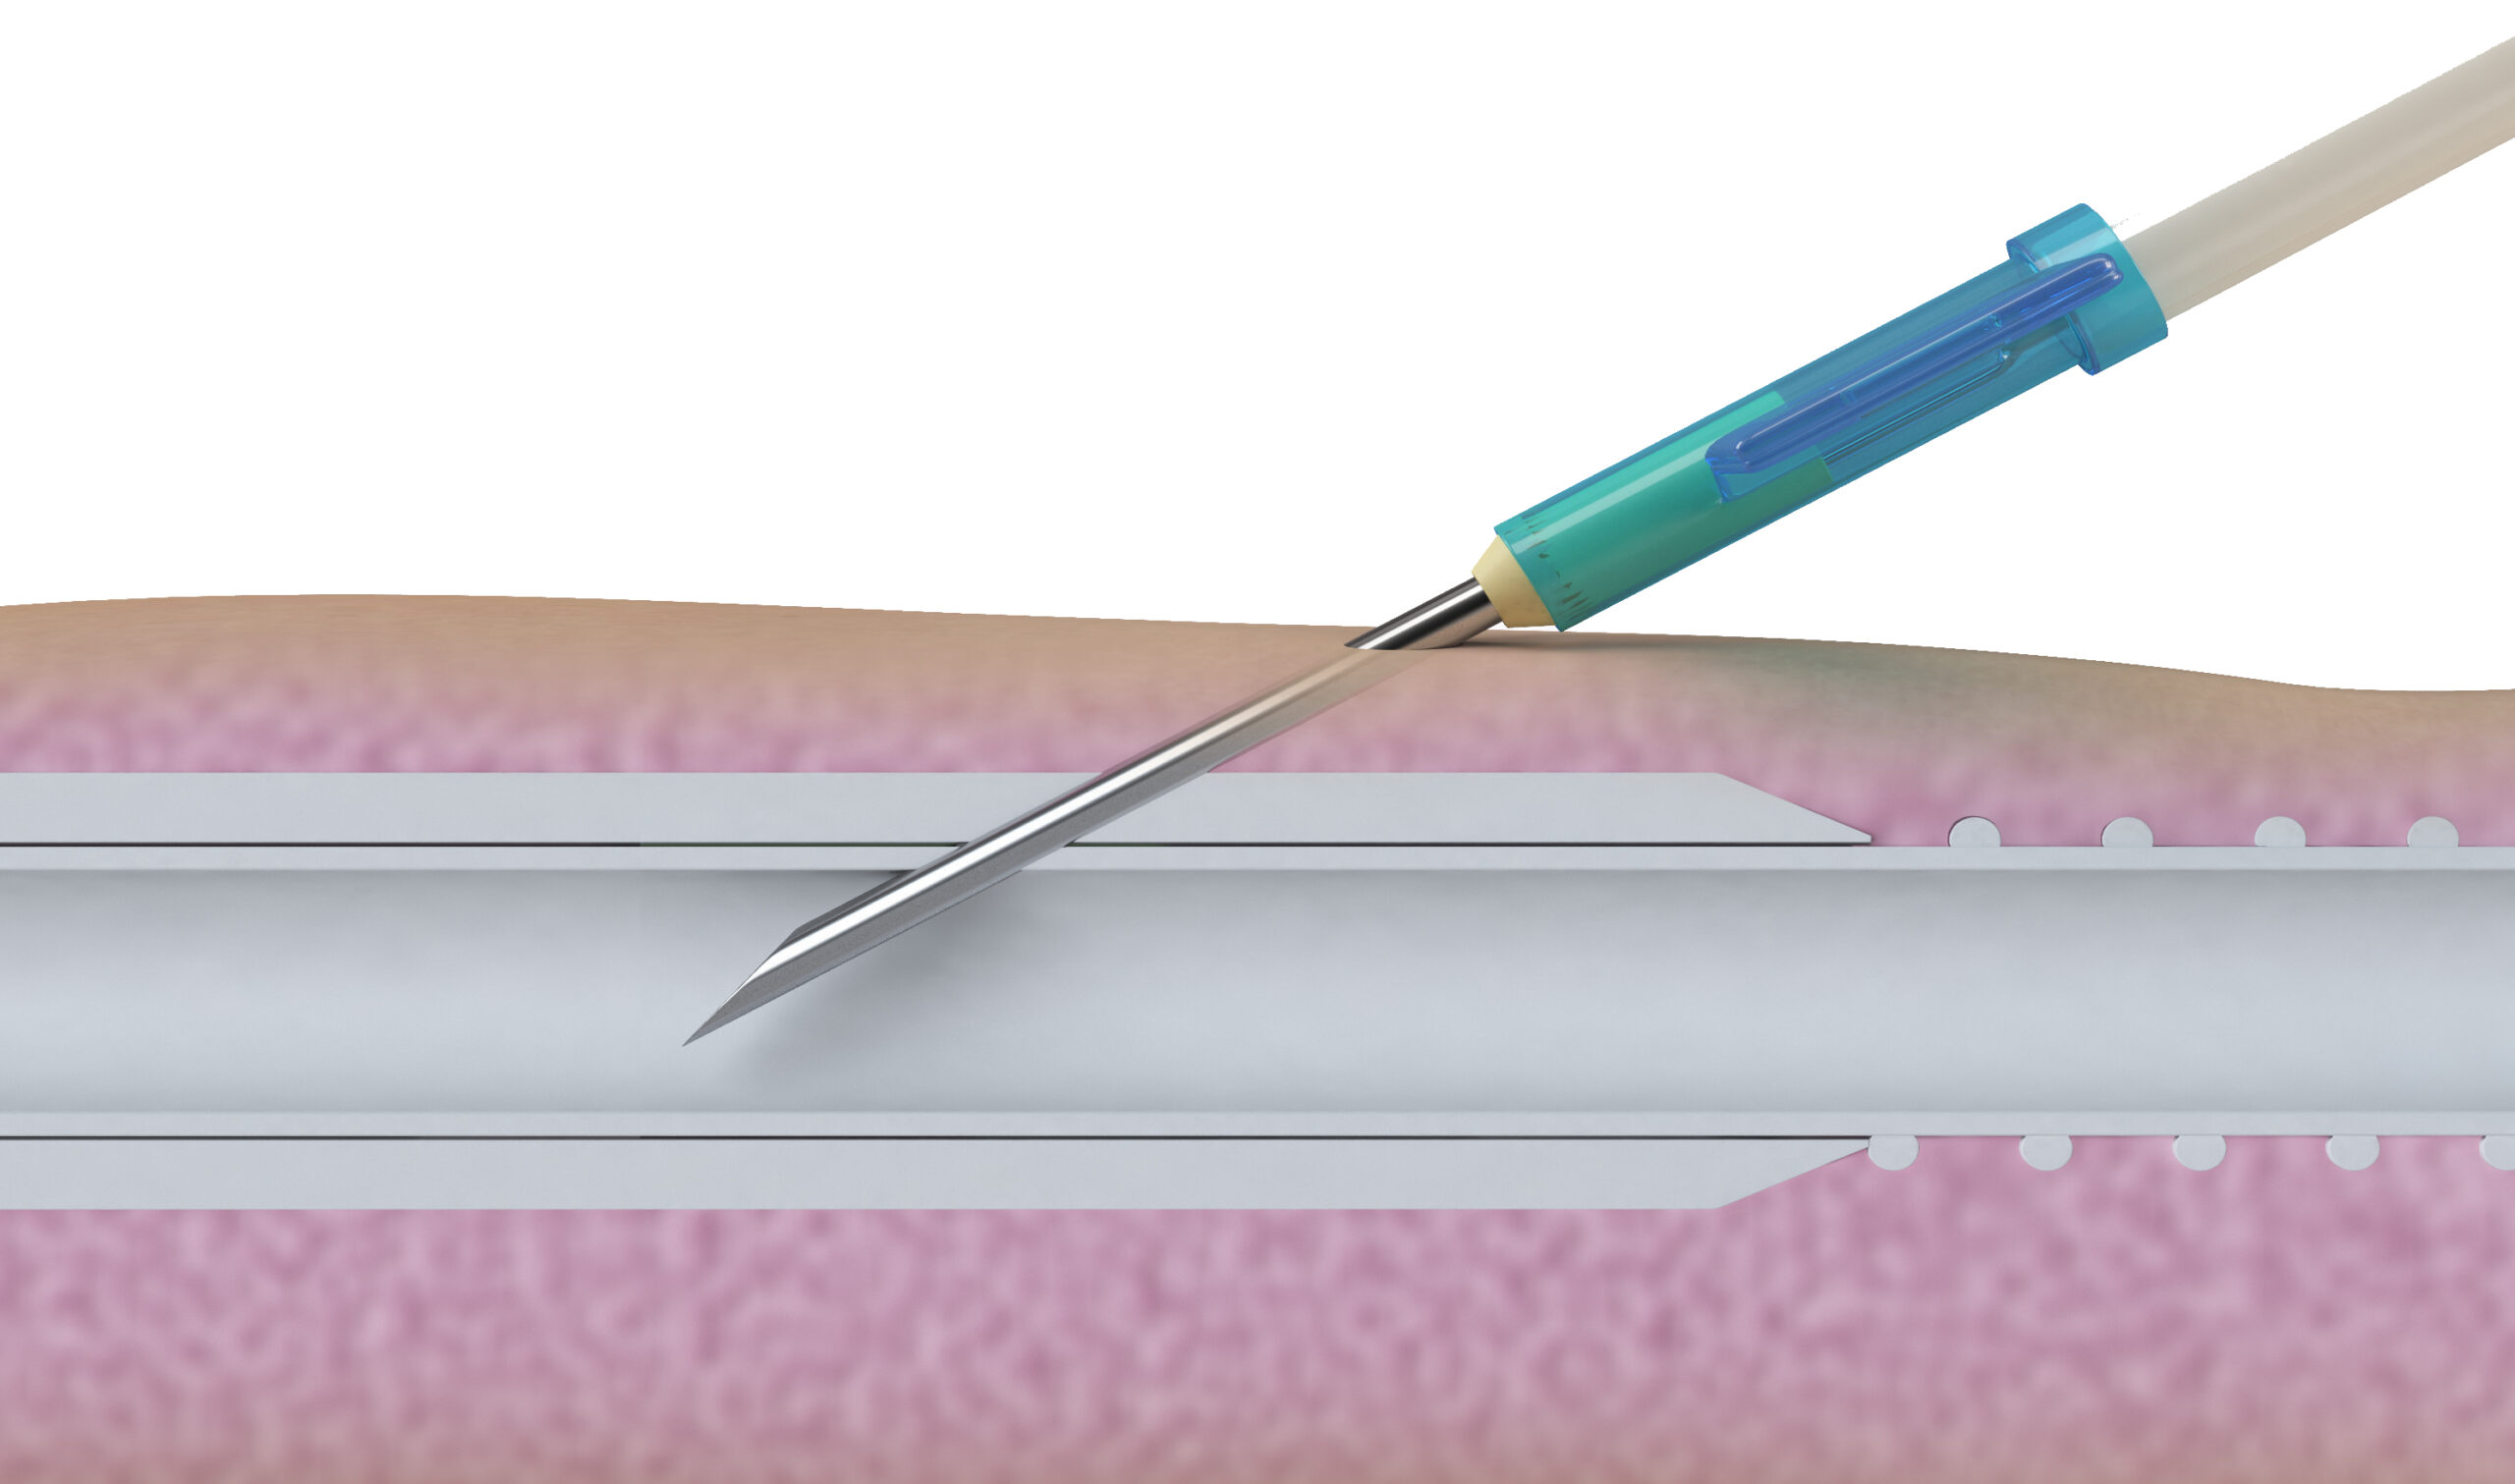
Secure – Once the needle is in position, secure in place per your unit’s standard procedures.
Hemostasis
Remove Needle
- When dialysis session is finished, withdraw the needle(s) & apply digital compression to the exit site to stop bleeding.
Apply pressure
- Maintain pressure until the bleeding stops.
- Inspect the puncture site for any sign of continued or abnormal bleeding.
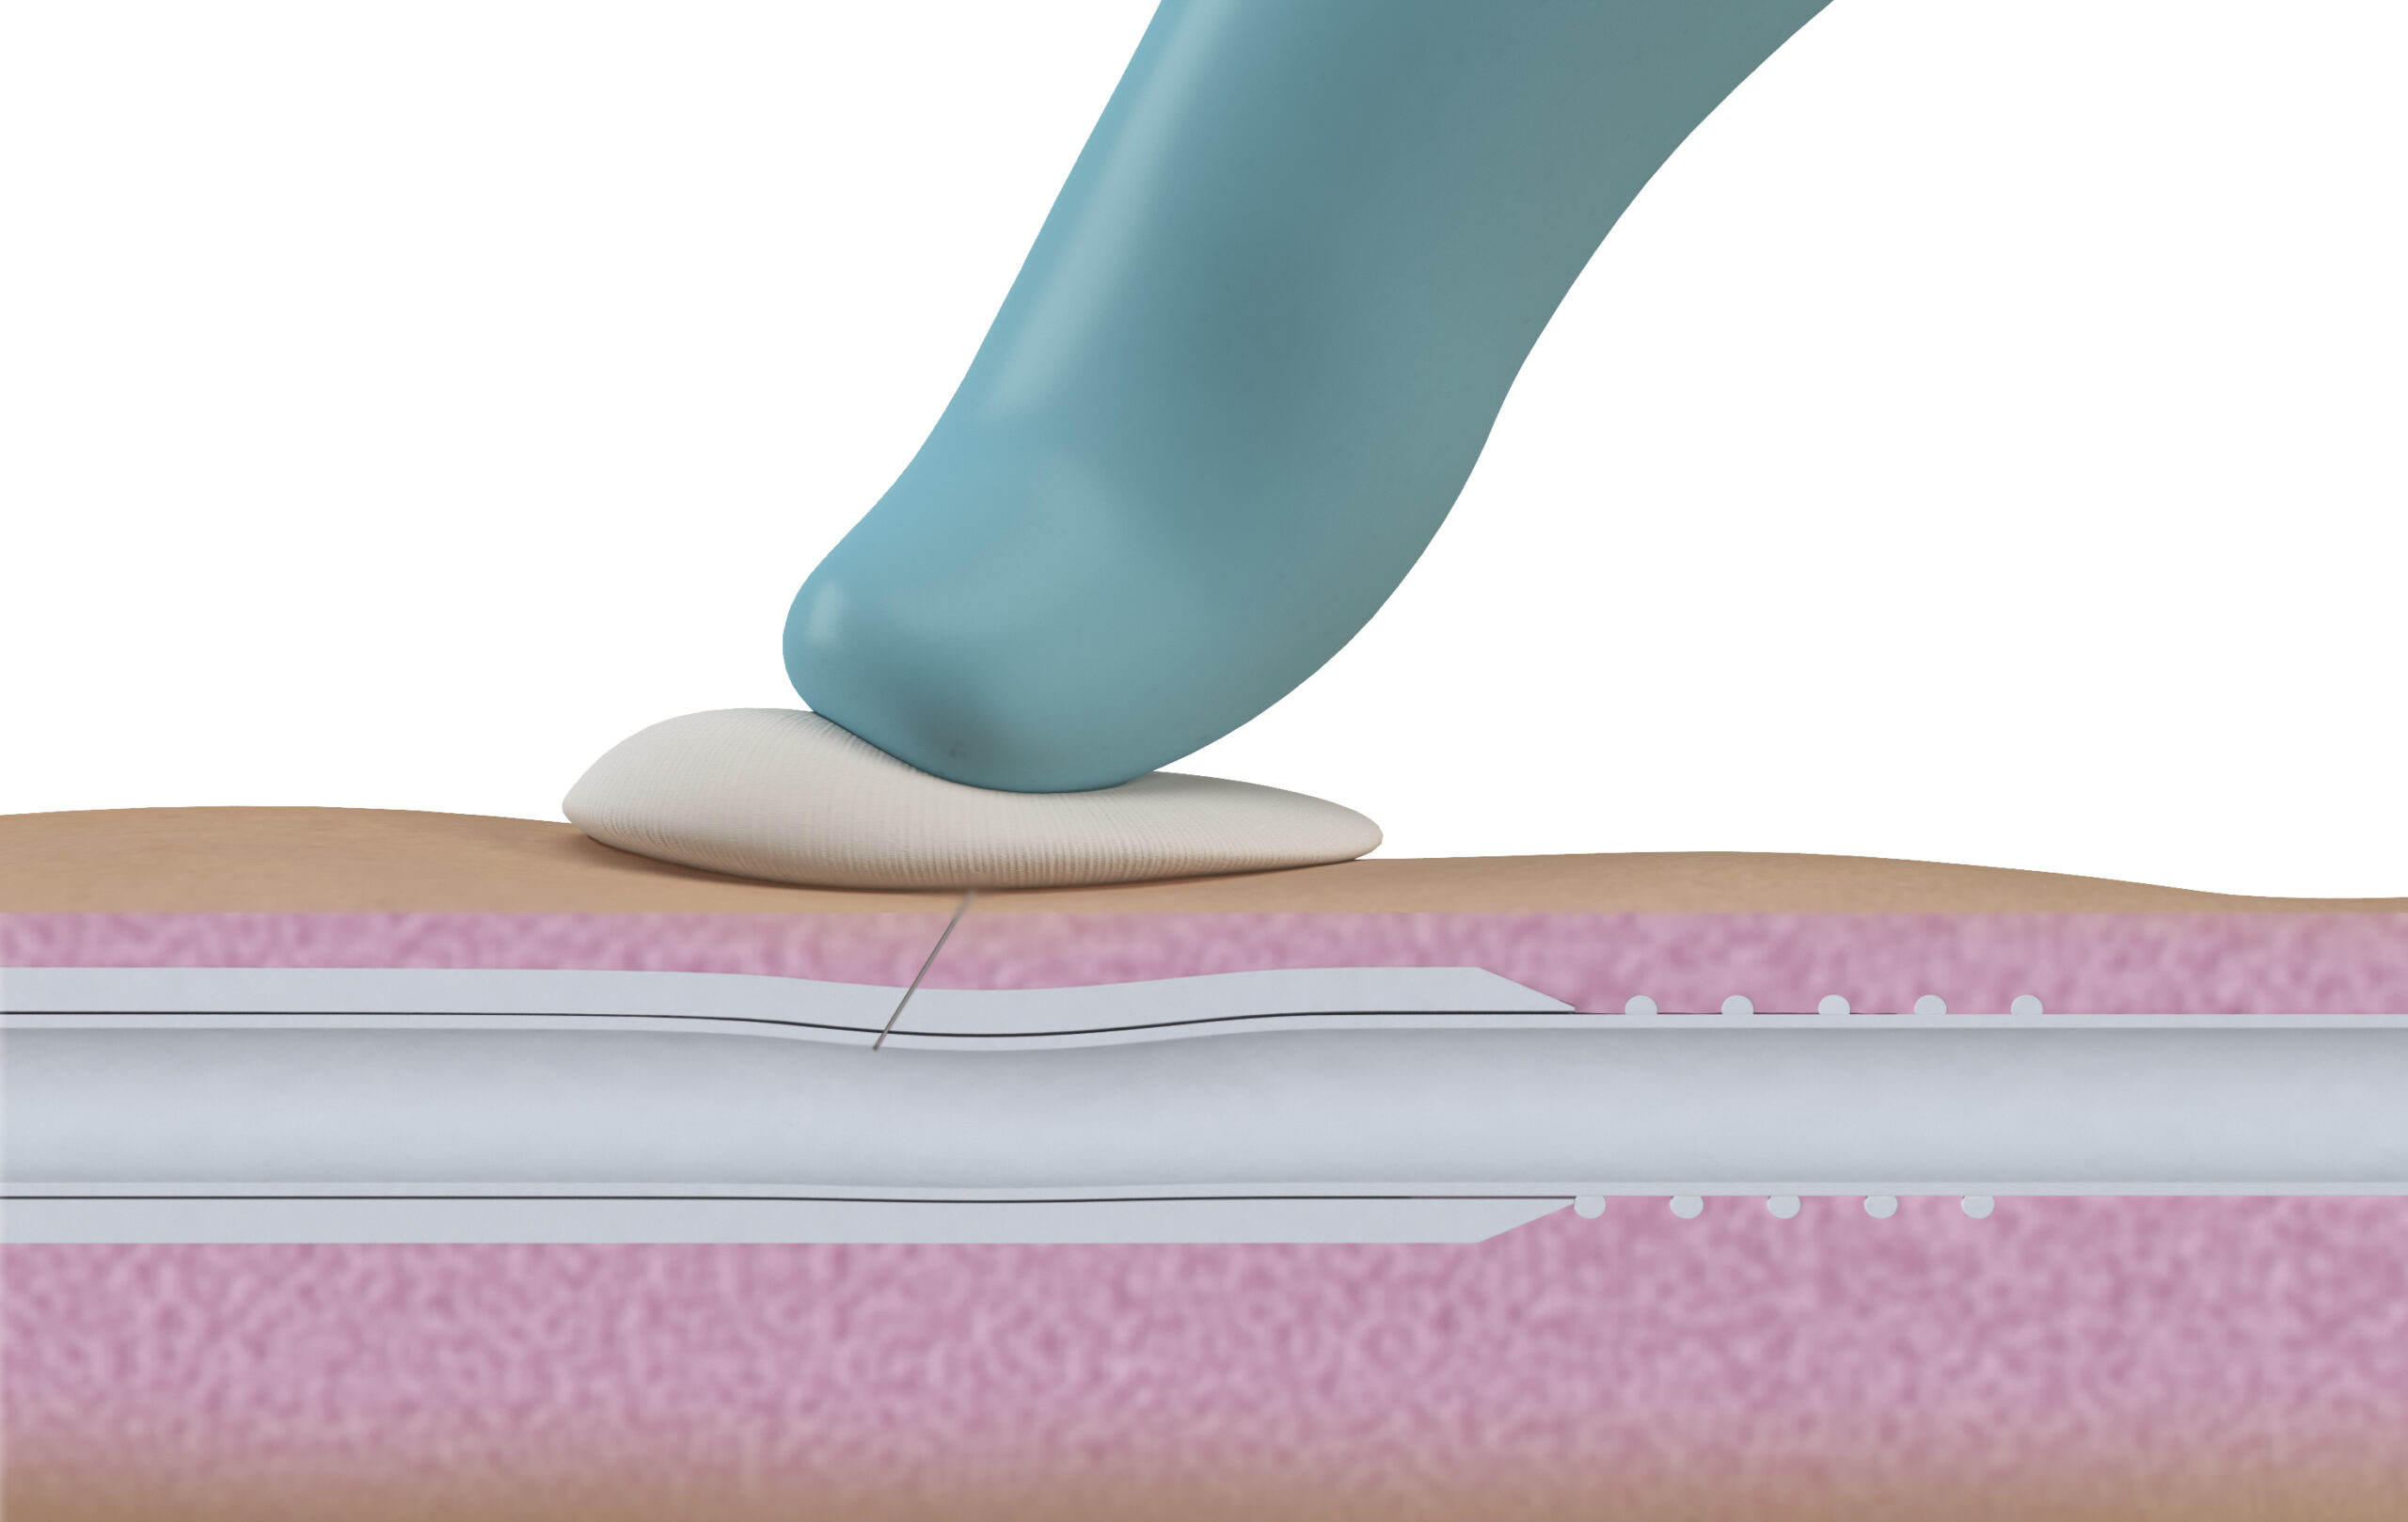
Bandage Site
- Follow your units standard procedure for bandaging the cannulation site(s) after hemostasis is confirmed. til the bleeding stops.
- Inspect the puncture site for any sign of continued or abnormal bleeding.

